What is a purchase order?
A purchase order (abbreviated to PO) is a document that specifies the type, quantity, and agreed price for products and services. It is issued from buyers to sellers and acts as confirmation of an order. Purchase orders are primarily used to control the purchasing of goods and services from external suppliers.
Why use a purchase order?
There are a number of advantages to using a purchase order.
- Purchase orders allow buyers to clarify their specific needs to sellers. This gives a clear start to your ongoing communications and also gives you both something formal to check back on if there are any discrepancies or disagreements later on.
- A purchase order can also be used to help manage inventory, of which handling incoming orders are usually apart. Purchase orders help employees, or yourself, manage incoming and expected deliveries.
- As purchase orders include the agreed price, you can factor this straight into your budget.
- Purchase orders are also a key part of an audit trail – meaning that when auditors will pay close attention to goods and services coming into the business in relation to payments going out. Having written proof of transactions makes their job much easier, and keeps your business much clearer.
- If you don’t have a pre-existing contract, then purchase orders are legally binding. Once the seller accepts the purchase order, it forms a legal contract between them and the buyer. Due to this, the buyer should make sure the PO is clear so as to avoid confusion. If buyers ever refuse payment, the seller remains protected because of the legally binding contract status of the document.
- Sellers can also use purchase orders for order fulfillment and payment processing. They may also use the purchase order number on their invoices (see below).
What does a purchase order contain?
Purchase orders contain essential company information, including name and address. It will also include the supplier’s name and address and the date the PO was issued. It also includes the order information, such us, the type of goods or services provided, their price, and the quantity where applicable.
In addition to the above, there is the ability to select a delivery date for the order, insert a purchase order reference from your suppliers’ as well as different delivery addresses. There is also the possibility to drop-ship your order (that is, send directly the order to your company’s customer).
A Purchase Order can then be converted into a Purchase after the goods are delivered or the services completed.
Creating a Purchase Order Receipt
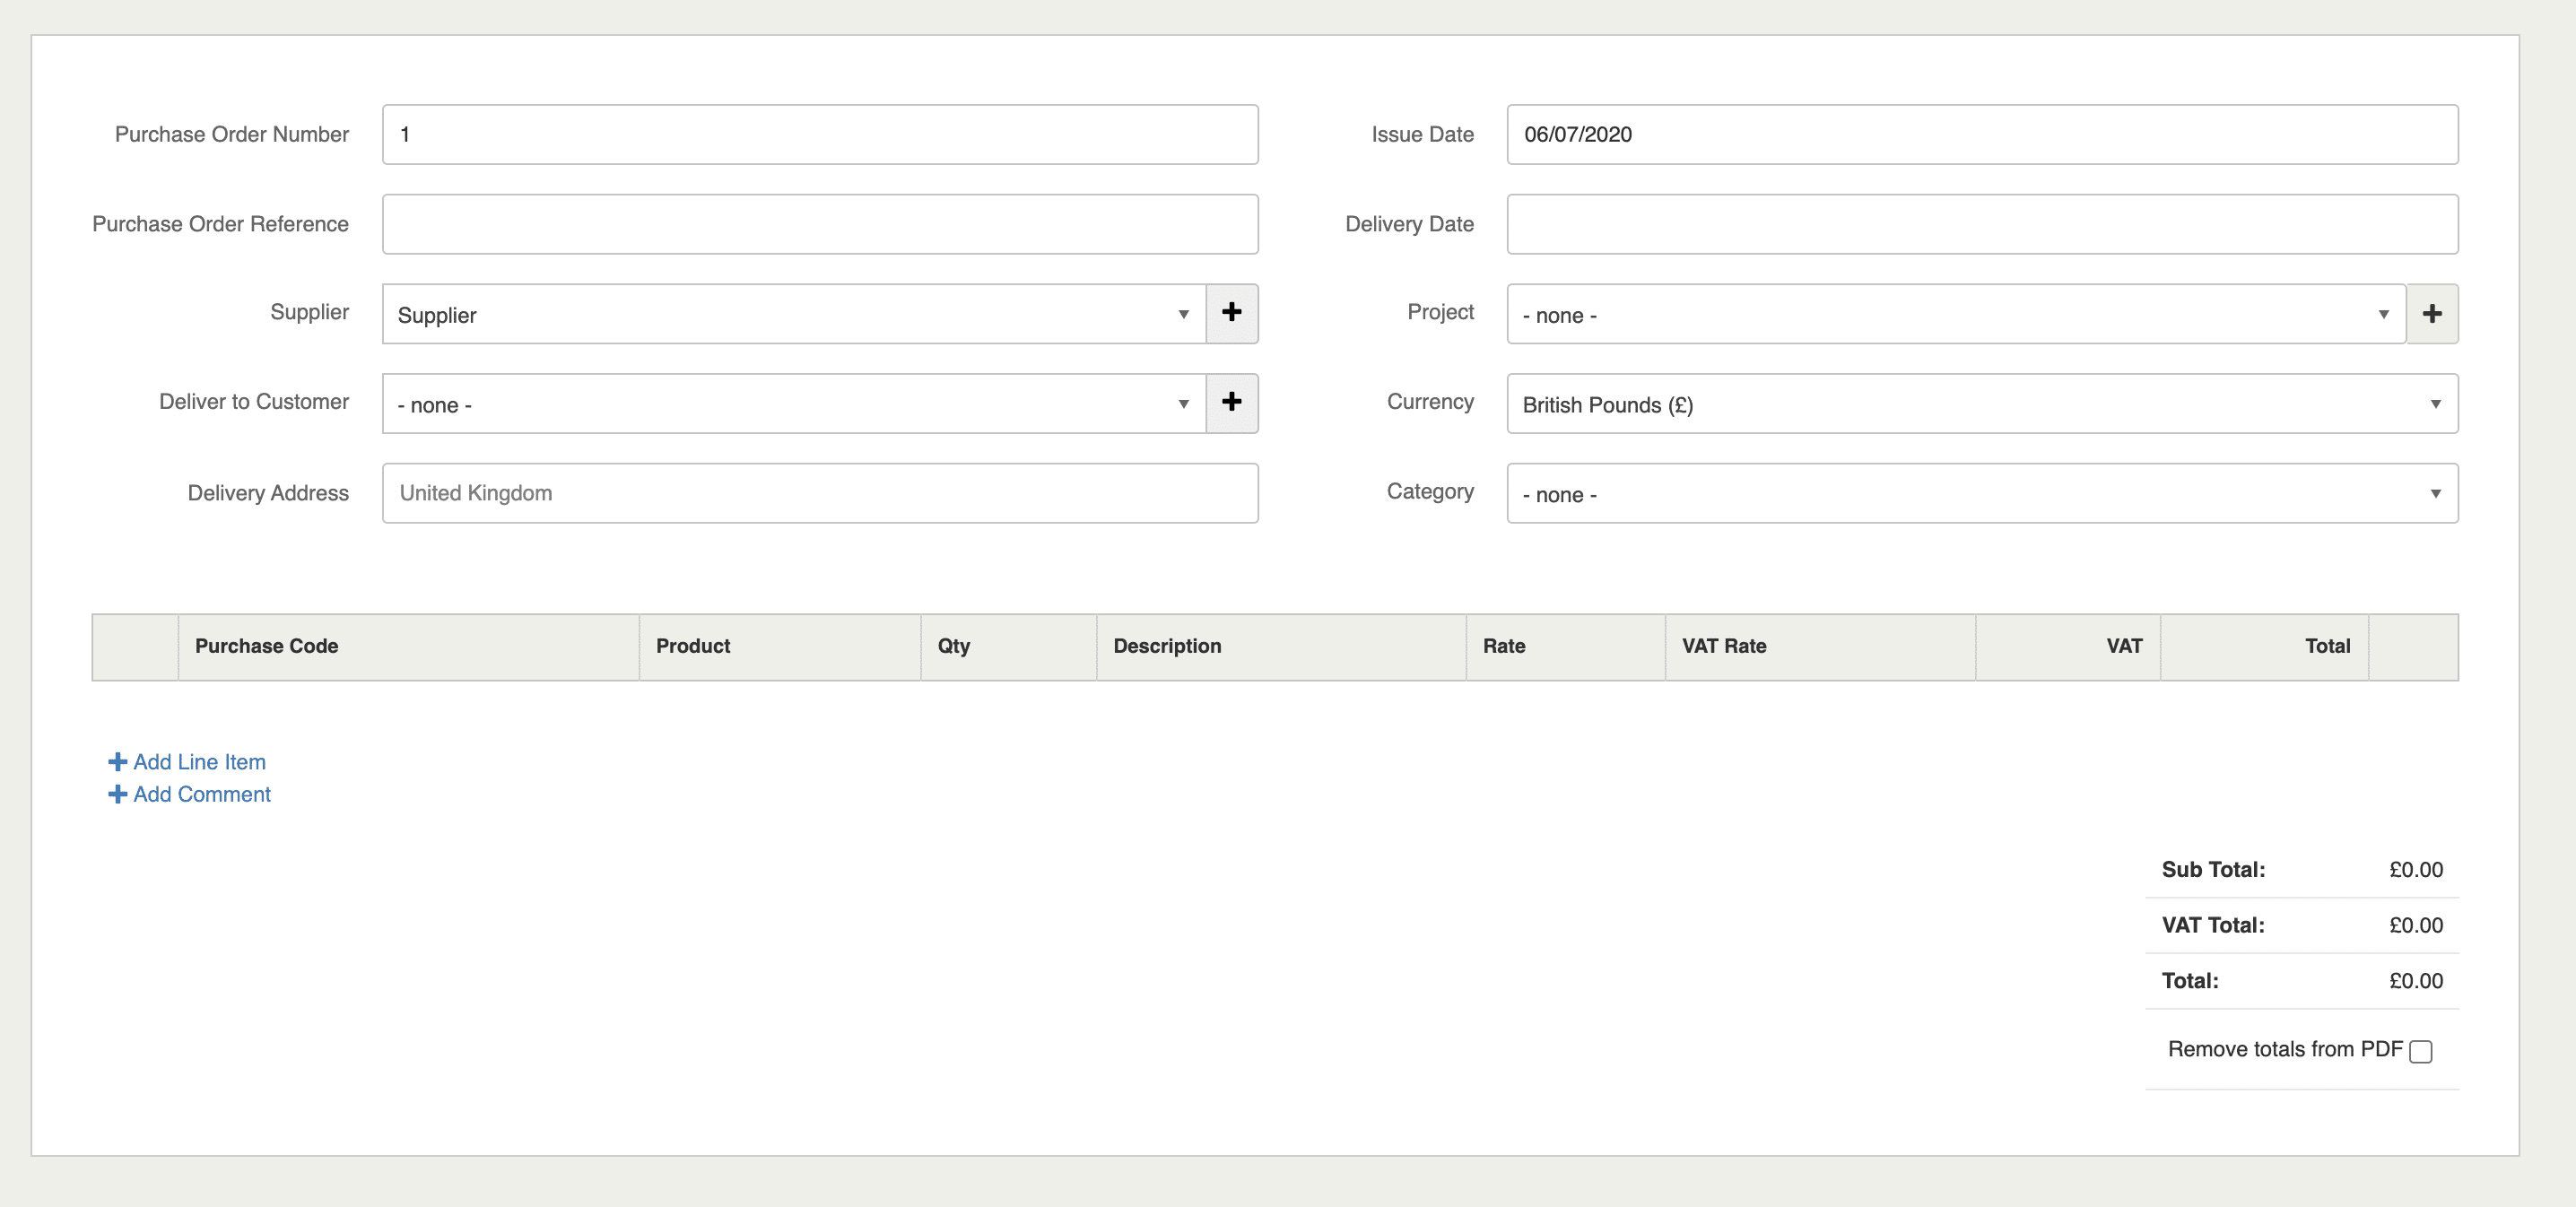
To create a Purchase Order in Kashflow go to Purchase Orders > Create+. You will then need to fill out the relevant fields.
- Purchase Order Number – This would be your receipt number in KashFlow.
- Purchase Order Reference – This is where you will put the Purchase Order number that you have been sent by the supplier.
- Supplier – You need to select the supplier that the purchase order applies to from the dropdown, then type to search.
- Issued Date – This is the date that the invoice was raised on.
- Delivery Date – This is the date that the Purchase order goods need to be delivered.
- Deliver to Customer – Select a customer if, for example, you want to send your ordered items directly to a customer.
- Delivery Address – Address that you want the goods to be sent to. This can be:
- Company Address if no customer is selected
- Customer Address – if you select ‘Deliver to Customer’ the goods will be sent to the customer’s delivery address
- One-off address if you want the goods to be sent to another address other than the company or customer address
- Currency – This is the currency that your receipt is in.
- Category – This is the category the purchase order is in. This field is optional.
Adding Line Items
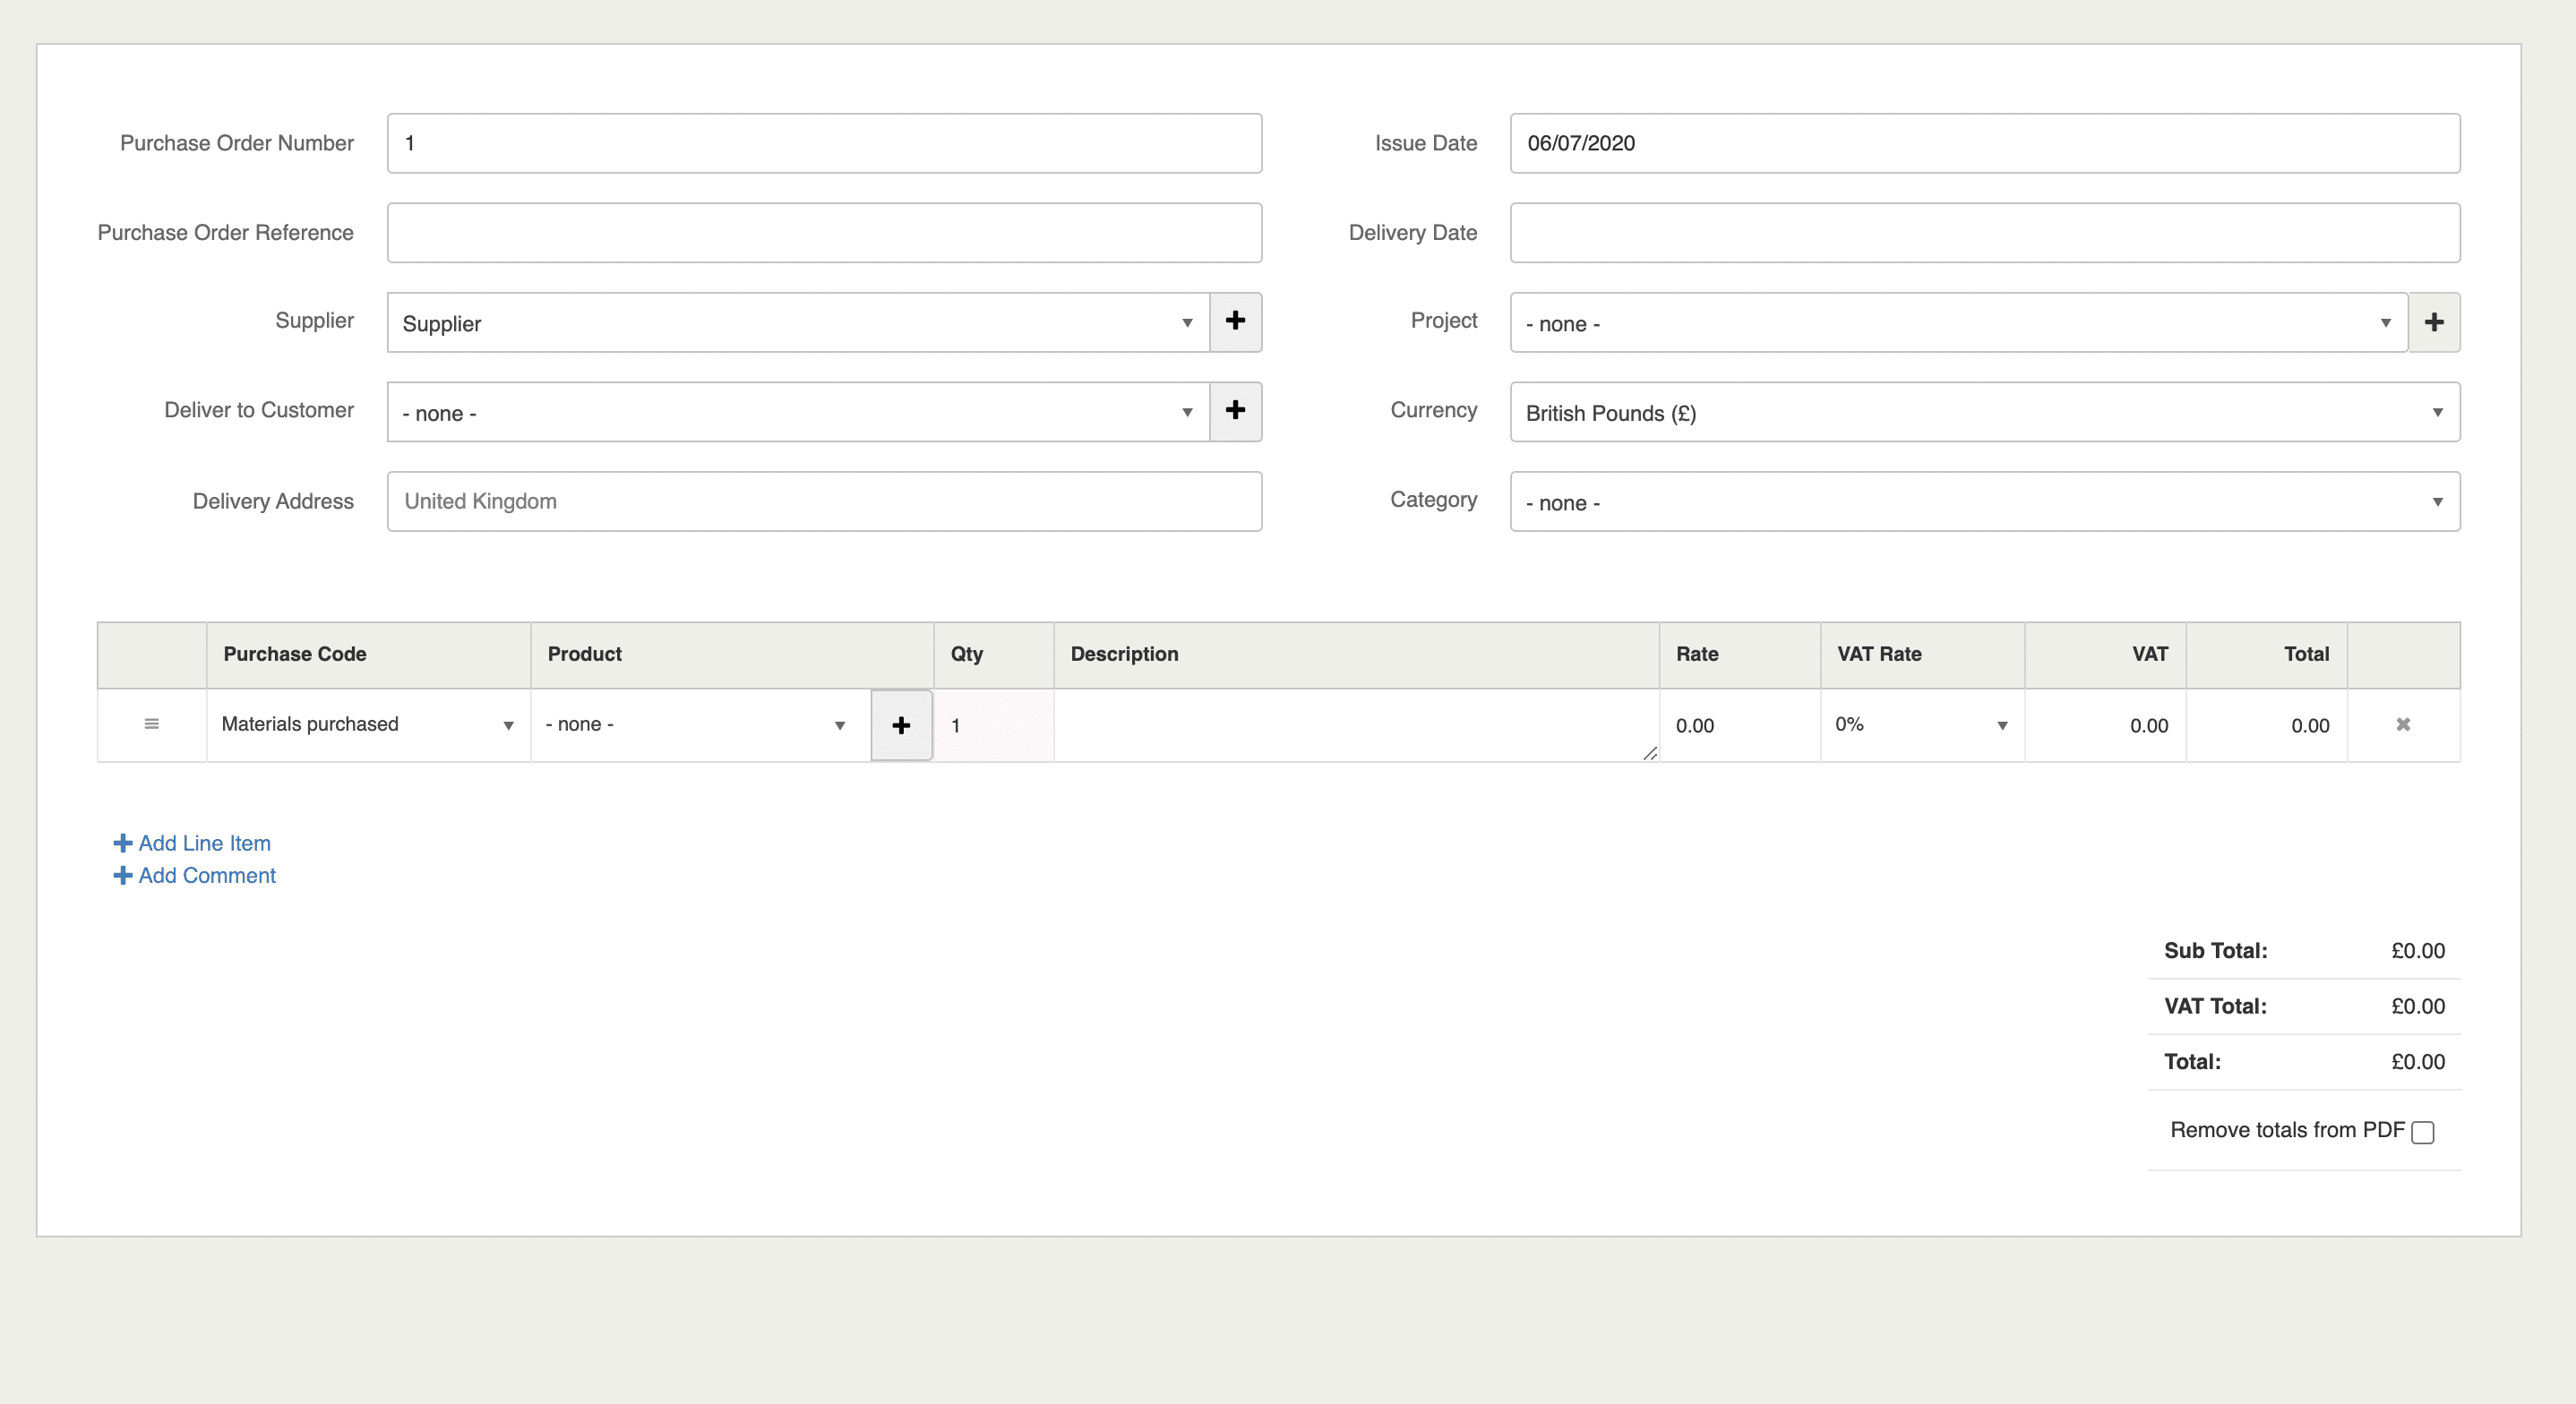
Then you have to enter the details of the receipt that are sending by hitting Add Line Item.
- Purchase Code – Use this dropdown to select the nominal code against the Purchase Receipt. These are configured in Settings> Chart of Accounts
- Product – This would be the Product against the Purchase Receipt if you have stock linked you would need to use this field.
- Qty – This is the quantity of this line item that you were sold. You can rename or disable this field by going to Settings > Invoice Options > Display Options.
- Description – This would be the field where you enter what you were sold. Try to include as much information you can, so you can keep a good backlog of your accounts.
- Rate – Your rate is the amount you were charged before VAT. Also known as Net Value.
- VAT Rate – This is the percentage VAT you were charged.
- Vat Amount –The amount of VAT you were charged on your Purchase Receipt.
- Total – The total amount you were charged. Including VAT.
- Re-Order Line Items – Drag and drop to re-order your line items.


