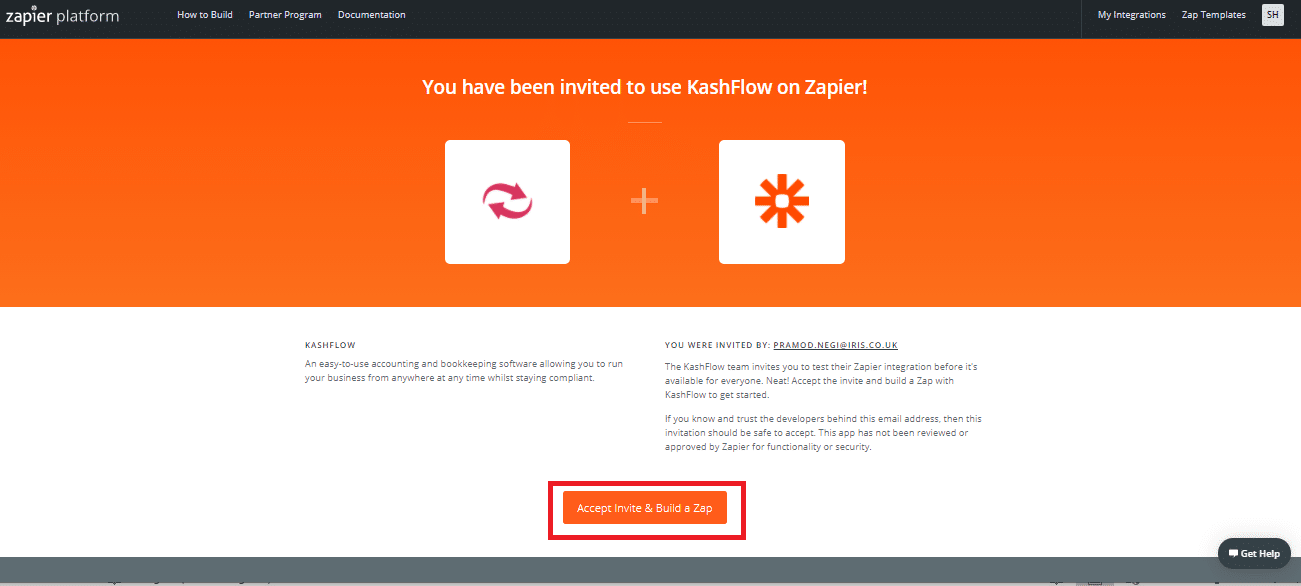
- Click on link you received from Zapier e.g. https://zapier.com/developer/public-invite/119621/9dec01881e9cae86bab5446177572b50/ to accept invitation for KashFlow Beta
- Click on Sign up

- Provide email ID, First Name and last name to create new free trial Zapier Account. You may alternatively sign up using your Google, Facebook or Microsoft account.
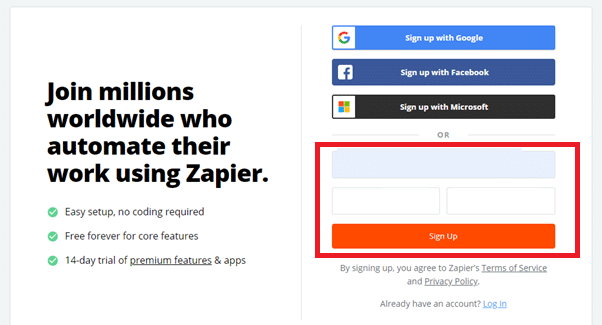
- Setup password for your Zapier account

- Click Skip if you do not want Zapier to suggest zaps based on industry , role etc.

- If you already have Zapier account, login using those credentials.


- Click ‘Make a new Zap’ from Zaps menu
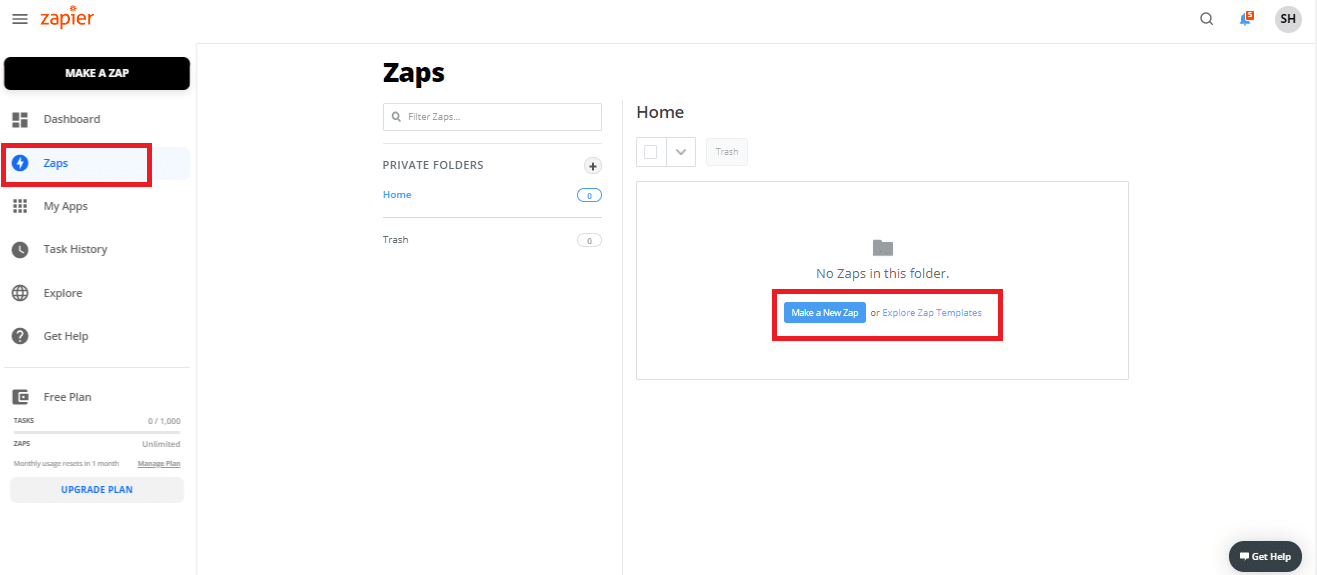
- If you already have Zapier account, click on ‘Create Zap’ from Zaps menu, once you login using your credentials.

- A page will open which will ask you to select details from trigger where you need to select source application and event.

- If you want you may give a name to your Zap at this stage or you can give later e.g. ‘Create/Update Customer in KashFlow when a new customer is added or updated in Zoho CRM’
- Select ‘Zoho CRM’ as an application for Trigger.

- You may select any event, which is exposed by the source application. Since we want to create a customer in KashFlow, when a new contact is created/updated in Zoho CRM, let’s select ‘New or Updated Contact’ event.
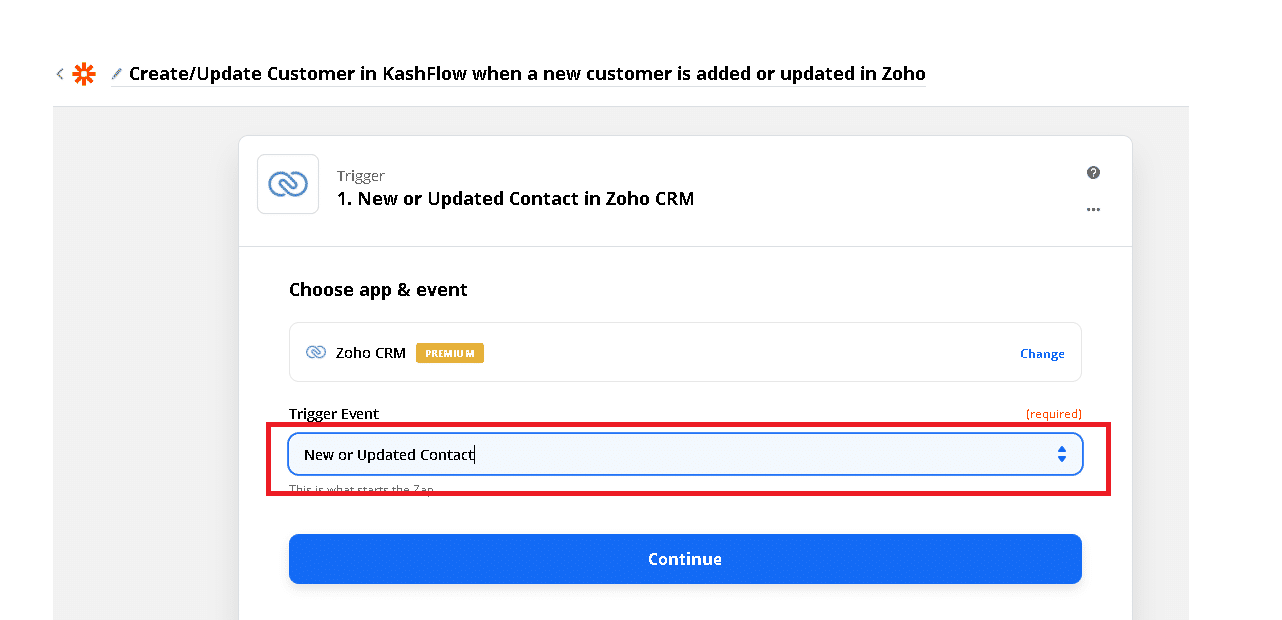
- Click ‘Continue‘

- Click on ‘Sign in to Zoho CRM’.
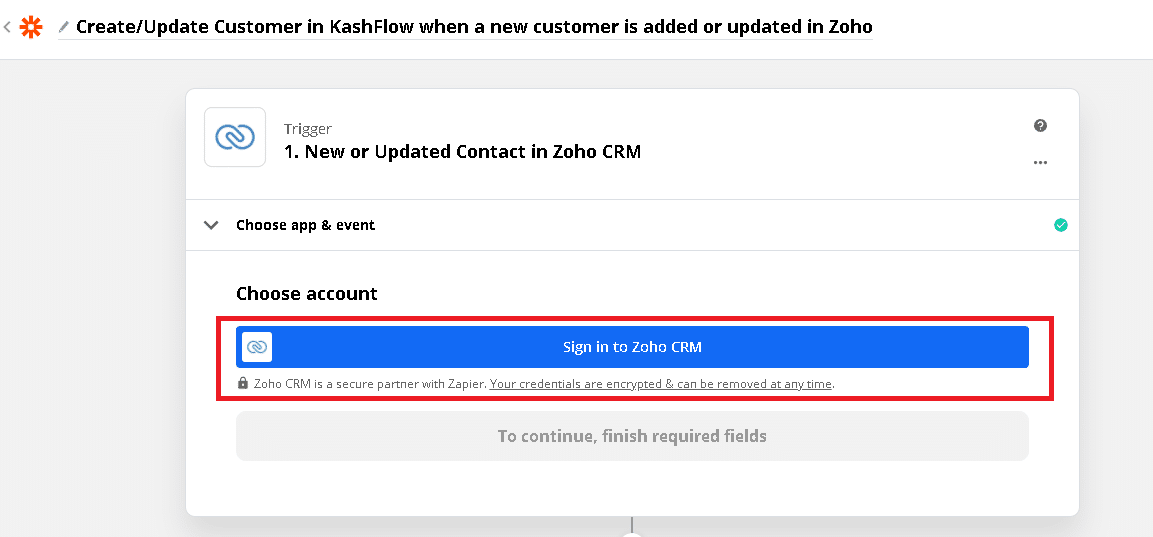
- Provide your Zoho credentials like Zoho Domain name, email ID and password.


- Click continue once the sign in with your Zoho account was successful.

- You may wish to test the trigger and confirm if you are getting the latest customer’s data
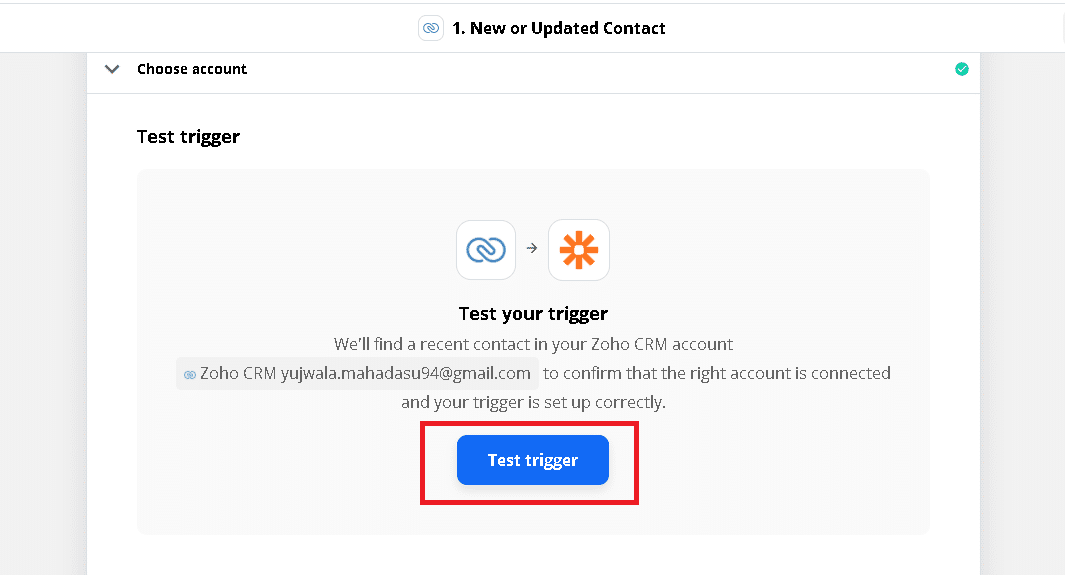
- If you are getting real contact’s data from your Zoho account, you are good to proceed. Click Continue to proceed.

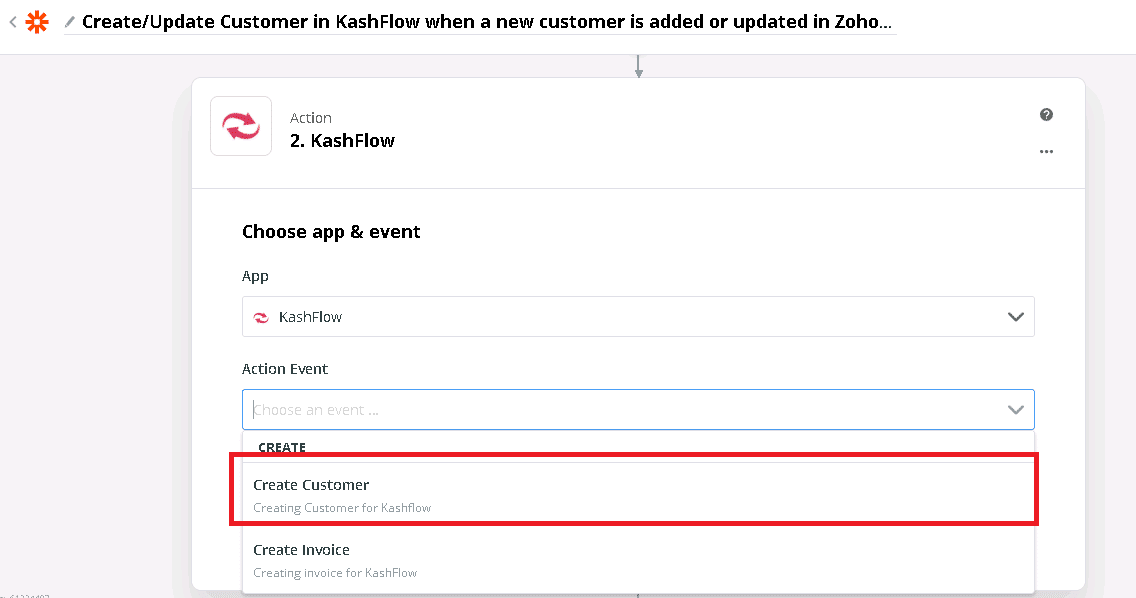
- Select ‘KashFlow’ as an application for Action. This will point to your Production/Live KashFlow Account.

- In case if you want to test integration on UAT first and then move to Production, Select KashFlow(1.0.2) than KashFlow (Beta).

- You may select any event which is exposed by KashFlow. We want to create a customer in KashFlow when a new contact is created in Zoho. Let us select ‘Create Customer’ action.
- Click ‘Continue‘

- Click on ‘Sign in to KashFlow‘.

- Provide your KashFlow credentials like username, password and memorable word and click on ‘Yes, Continue’.

- If your credentials are correct, it will ask to redirect to the Zapier Page again. Click ‘Continue‘ to proceed to setup the action.
- Here you will need to answer few questions and map Zoho fields with KashFlow fields.
- In Zoho, the customer is uniquely identified using email and so select ‘Email’ for ‘How Should Existing Customer In KashFlow Be Matched?’. It will help to create new customer when not found. And also give opportunity to update customer when found.
- In case, if you would like to override customer’s information in KashFlow with customer’s information in ‘Zoho’, select ‘True’ for ‘Would You Like To Update A Customer When Found’
- Refer to below standard mapping for a customer.
| Sr No | KashFlow | Zoho |
| 1. | Name | First Name Last Name |
| 2. | Title | Salutation |
| 3. | Contacts. First Name | First Name |
| 4. | Contacts. Last Name | Last Name |
| 5. | Contacts. Full Name | First Name Last Name |
| 6. | Contacts. Telephone | Phone |
| 7. | Contacts. Mobile | Mobile |
| 8. | Contacts. Fax | Fax |
| 9. | Contacts. Email | |
| 10. | Addresses. Address Line 1 | Mailing street |
| 11. | Addresses. Address Line 2 | Mailing City |
| 12. | Addresses. Address Line 3 | Mailing State |
| 13. | Addresses. Post Code | Mailing Zip |
| 14. | Addresses. Country | Mailing Country |
| 15. | Notes | Description |
- Once you are done with mapping, you may want to test this zap. Go to the end and click on ‘Test and Continue’

- Go to KashFlow and verify that the new customer got created. If you wish to change any mapping do that now.
- Once you are sure, turn the zap ON.

Notes
- Mapping for mandatory fields is required
- Above mapping is for reference and will work most of the times. However, you may choose to do the mapping based on where you want to see the data from Zoho in KashFlow.
- If you do not want to flow certain fields from Zoho to KashFlow, you can leave them default/blank.