If you are currently using Square then there are several ways that this can be integrated with KashFlow.
- Payment Processing – Take credit card payments with Square on your KashFlow invoices
- Syncing Order, Payment, Bank Deposit and Customer Data with Square
- Importing Bank Deposits for Payments taken with Square
- Importing and exporting Customer data
Square as your Payment Processor
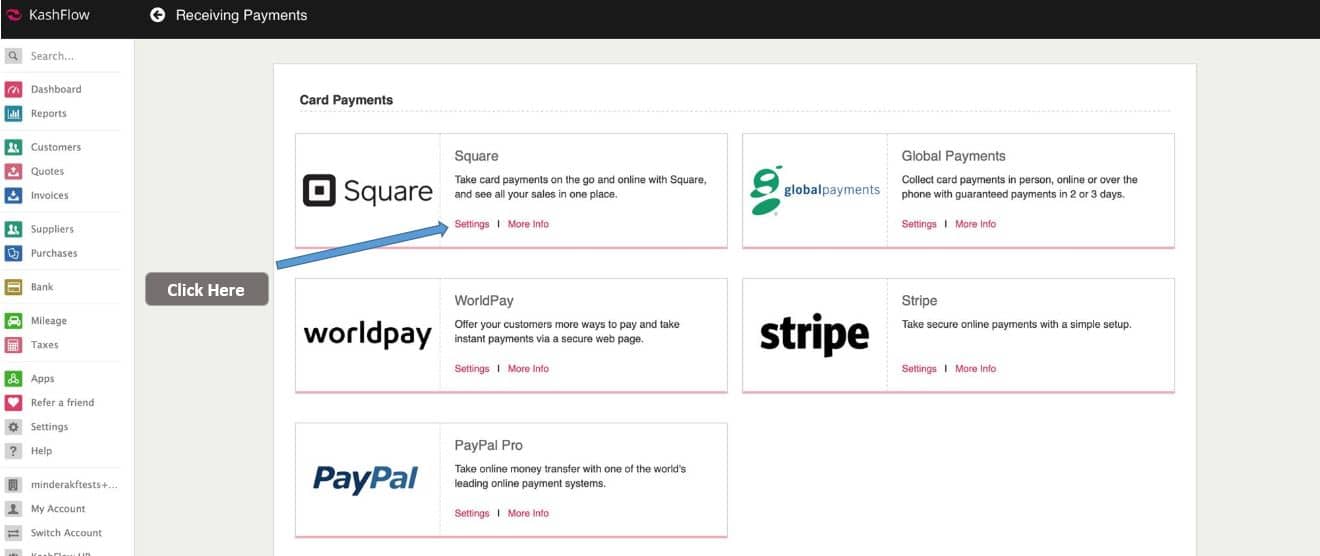
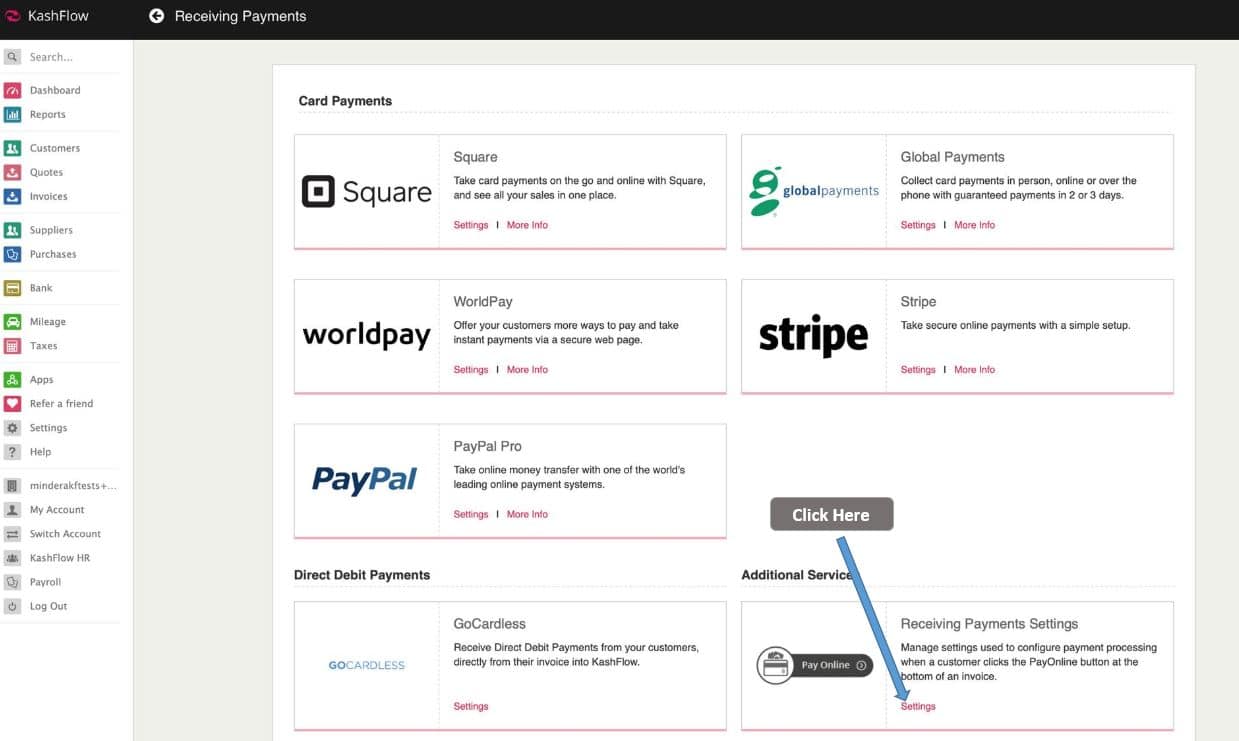
To use Square as your payment processor, you will first need to connect this to KashFlow by going to Settings> Receiving Payments and select Settings under the section for Square.
Select the Bank Account, Currency and Payment method needed for your Square integration and then click on the “Connect to Square” button.
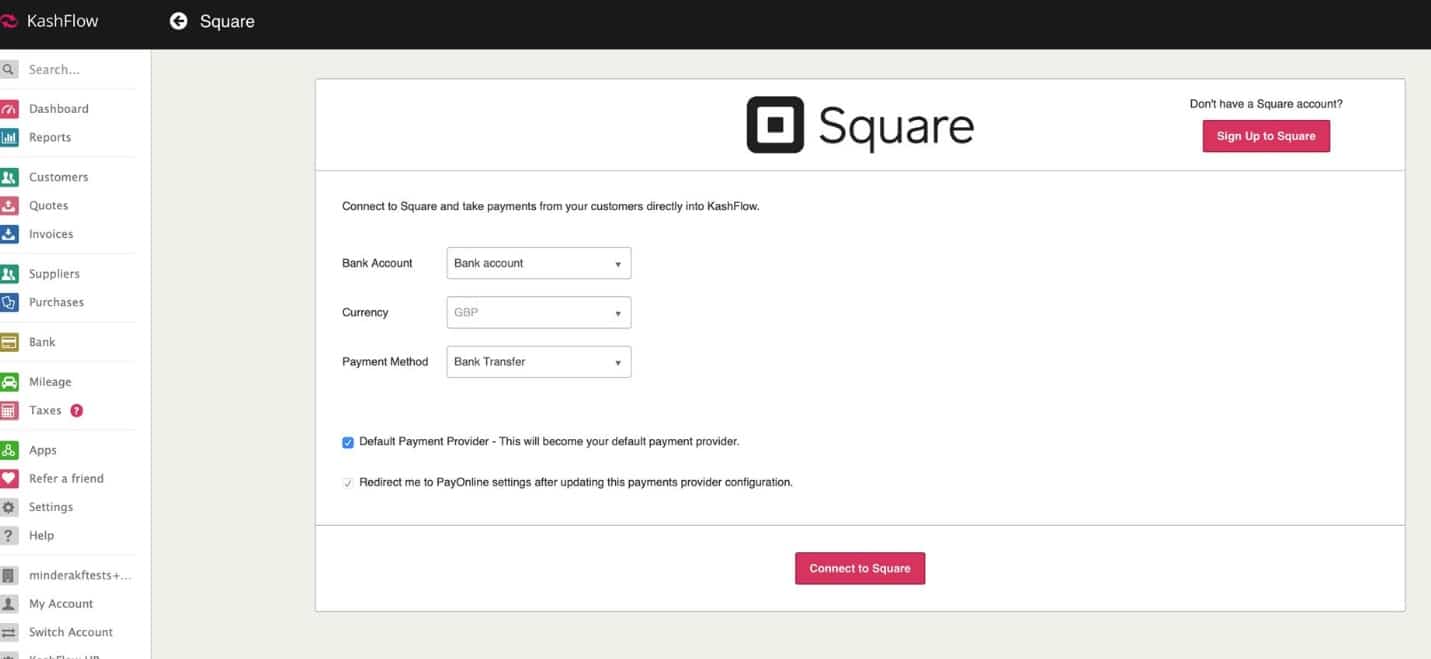
You will then be directed to the Square website and you will be asked to log into your Square account. When you successfully enter your login details for Square and accept permissions, you will be re-directed back to KashFlow and this will show as connected.
You will then be asked to fill in the Location. This location is something that you would have set up within Square itself. Locations can represent physical locations or virtual locations such as an online store. Upon connecting to KashFlow the integration will read and display all active Square Locations. If you need to create or edit a location with Square, you can do so from the instructions on this link.
Once you have selected your Location, click “Update”.
Taking Payments
There are two ways that KashFlow can take payments through Square.
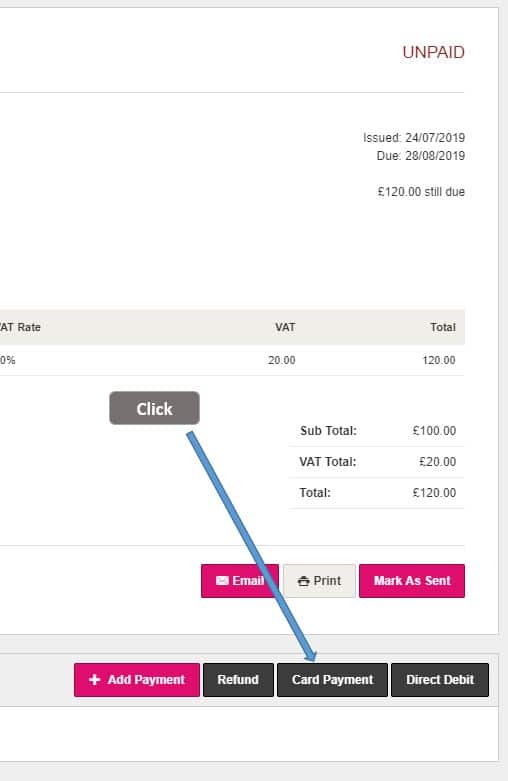
The first way is to take the payment directly from the invoice. You can do this by opening the invoice and go to “Card Payment” at the bottom of the screen.
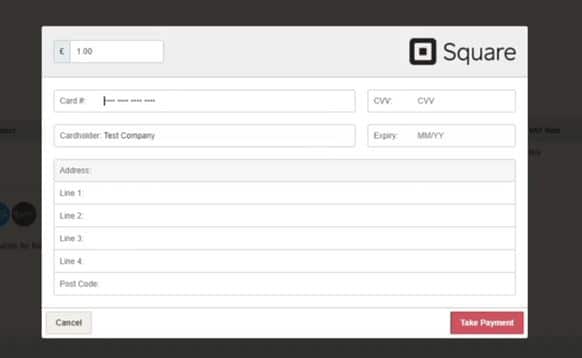
You will then be prompted to fill in the details of the payment card from your customer. Once you have entered all the details click on “Take Payment”. This will complete the payment.
The second way to take the payment is to use a Pay Online button. You can set this up by going to Settings> Receiving Payments> Additional Services> Pay Online.
Set the Payment processor as Square and click on the “Connect” button to link your KashFlow account to Square. You will then be directed to the Square website and you will be asked to log into your Square account. When you successfully enter your login details for Square, you will be re-directed back to KashFlow and this will show as connected.
Then you can select which pay online button you wish to use and click on “Save Settings”.
Processing Refunds through KashFlow
If a payment has been taken from a customer n a KashFlow invoice through Square via either payment option, then you are also able to process a refund back to the customer through KashFlow. This is only available through integration through Square. If you would like to refund payments taken via Square outside of KashFlow (for example through Square Point of Sale) you may do so on Square Dashboard.
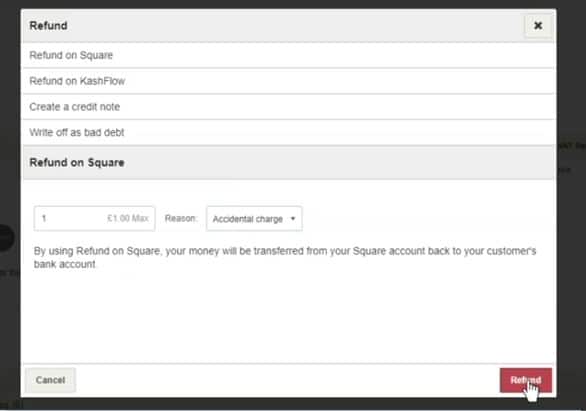
To process the refund, you can open up the invoice that you wish to refund and click on the “Refund” button in the bottom corner.
You will need to ensure that the “Refund on Square” option is selected, and when you are ready to do so you can click on “Refund”.
If a payment was taken by another payment processor, then you will not see the above refund options.
Syncing Order, Payment and Customer Data with Square
You can also import Customer details, Orders, Payments and Settlements from Square. To do this, you will need to go to Apps and under the section for Square click on “Connect to Square”.
You will then be taken to the Square setup wizard. After you have worked through the wizard the software will automatically sync to the settings you have put in place.
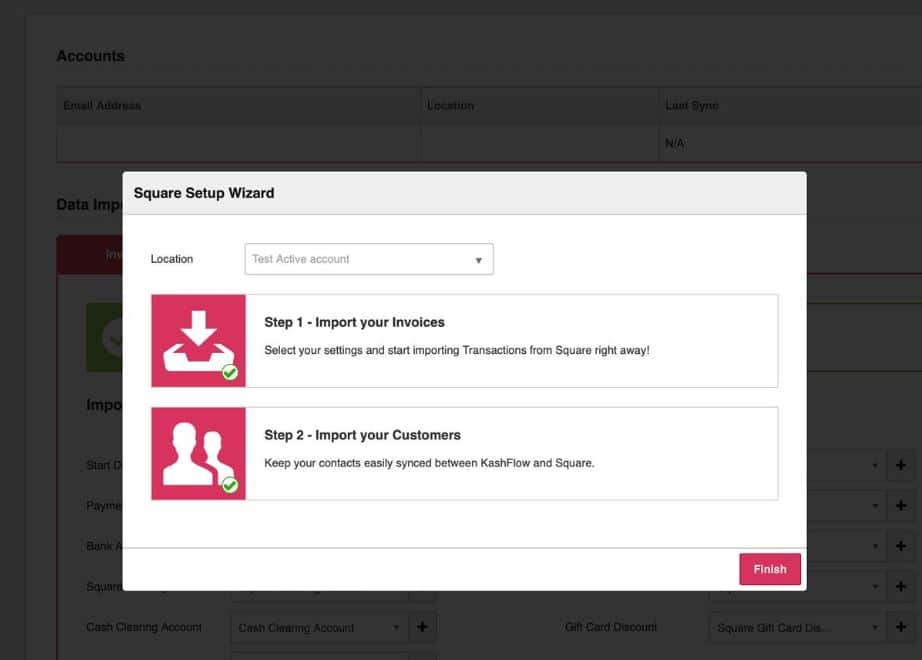
Click on the option for “Step 1 – Import your Invoices” and then you will be taken to the next screen.
You will then be asked to enter the configuration settings for importing your invoices.
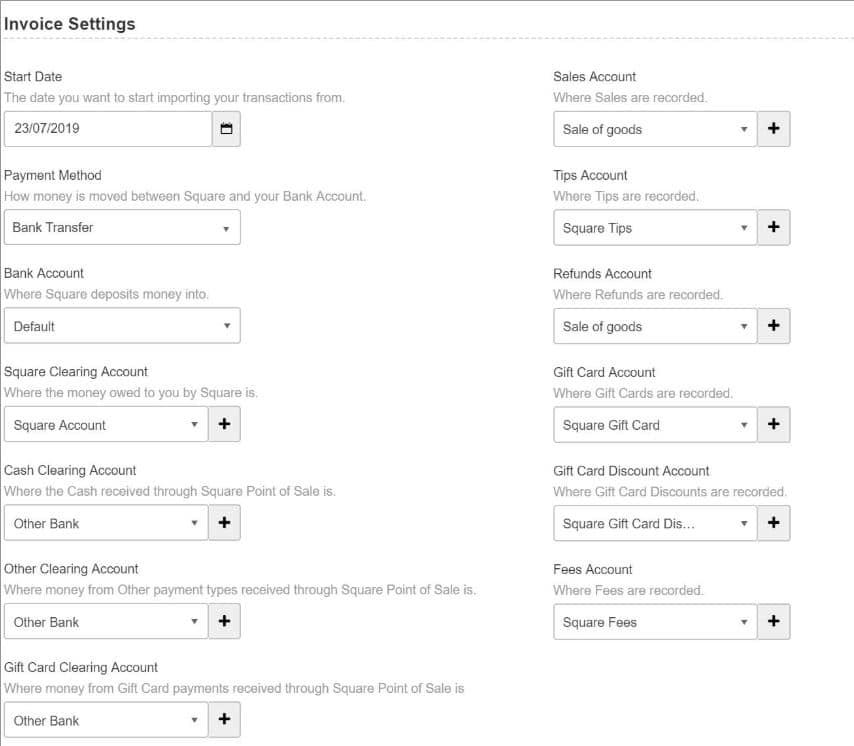
From this screen, you will need to configure the below settings:
Start Date – The date you want to start importing your Orders, Payments and Bank Deposits – If you insert a past date, any invoices from then until now will be pulled through in one bulk import. After this initial import the invoices will be imported on a daily basis automatically. Orders, Payments and Bank Deposits will import from midnight on this date in your location’s local time zone.
Payment Method – How the money is moved between Square and your Bank Account – This would normally be the “Bank Transfer” option.
Bank Account – Your bank account where Square deposits money into – You will need to set up a bank account in Kashflow if one does not exist already, you can do this from the Bank menu.
Square Clearing Account – Where the money owed to you by Square is between the time you receive a payment and when it is deposited into your Bank Account
Cash Clearing Account – Where the Cash received through Square Point of Sale is, typically representing Petty Cash or the Cash in Till – You will need to set up a bank account called “Square Cash Clearing Account”, you can do this from the Bank menu. When you deposit funds from this account into your Bank Account, you should create a Journal Entry in KashFlow to debit this account.
Other Clearing Account – Where money from Other payment types received through Square Point of Sale is – You will need to set up a bank account called “Square Other Clearing Account”, you can do this from the Bank menu. `Other` payment types include Cheques, 3rd Party Gift Cards, or any Other tender type.
Gift Card Clearing Account – Where money from Gift Card payment types received through Square Point of Sale is – You will need to set up a bank account called “Square Gift Card Clearing Account”, you can do this from the Bank menu.
Sales Account – Where Sales are recorded – This is the sales nominal code that you wish to use. If you would like to create a new one, you can do this by going to Invoices> Sales Code.
Tips Account – Where Tips are recorded – This is the nominal code that you wish to use. If you would like to create a new code, you can do this by going to Invoices> Sales Code.
Refunds Account – Where Refunds are recorded – This is the nominal code that you wish to use. If you would like to create a new code, you can do this by going to Invoices> Sales Code.
Gift Card Liability Account – Where Gift Cards are recorded – This is the nominal code that you wish to use. It represents the gift card liability that your Customers can redeem on Square gift cards that you have issued. If you would like to create a new code, you can do this by going to Invoices> Sales Code.
Gift Card Discount Account – Where Gift Card discounts are recorded, for example if you issue a gift card at a 20% discount – This is the nominal code that you wish to use. If you would like to create a new code, you can do this by going to Invoices> Sales Code.
Fees Account – Where Square Transaction Processing and any other fees are recorded – This is the nominal code you wish to use. If you would like to create a new code, you can do this by going to Invoices> Sales Code.
To import your Invoices from Square, you will need to go to the same screen from the Apps menu but this time select “Step 2 – Import your Customers“.
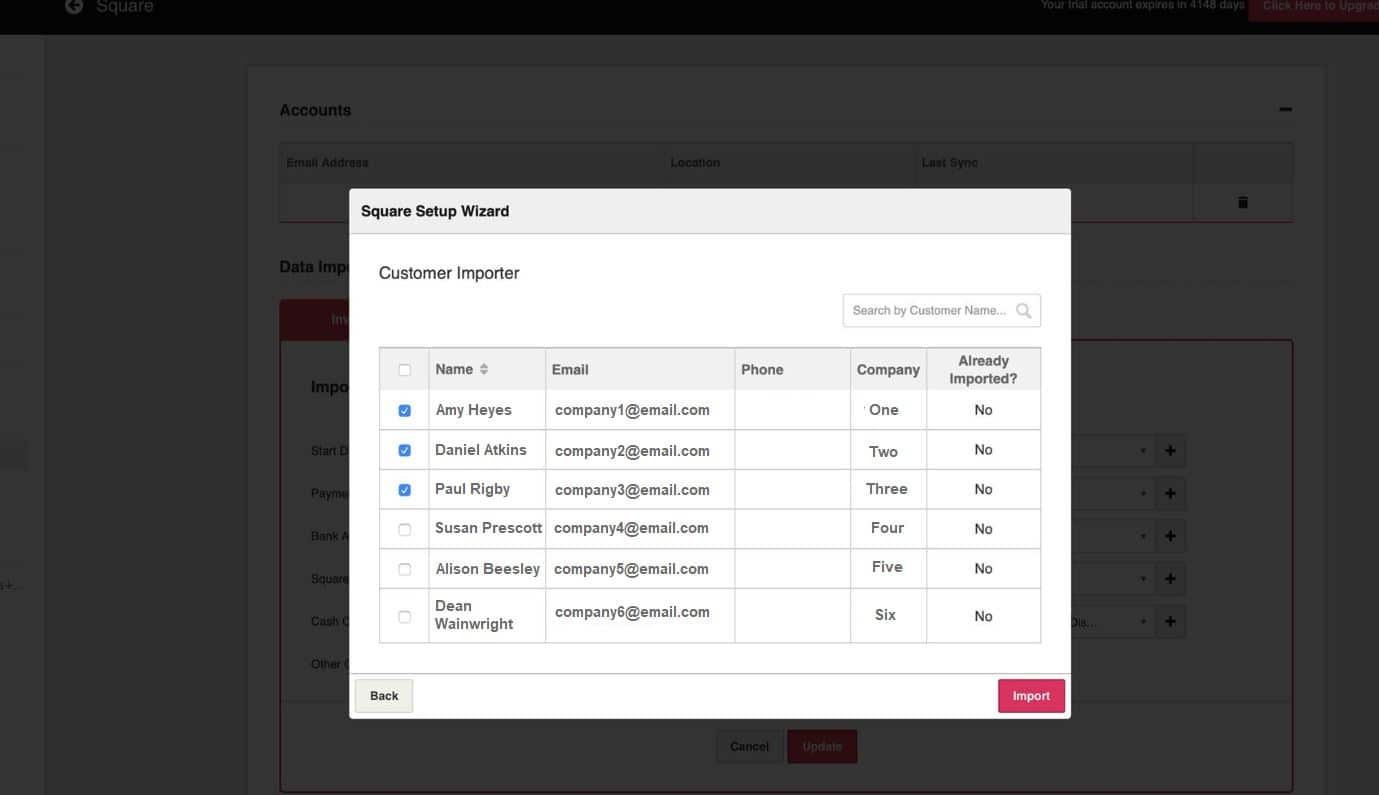
From here you will be able to select the customers that you wish to import by putting a tick in the first column next to that customer and click on the “Import” button when you are ready.
If you ever need to change the configuration of the importer you can do this by going to Apps> Square and you will see the options. Once you have made the changes you require you can click on the “Update” button.
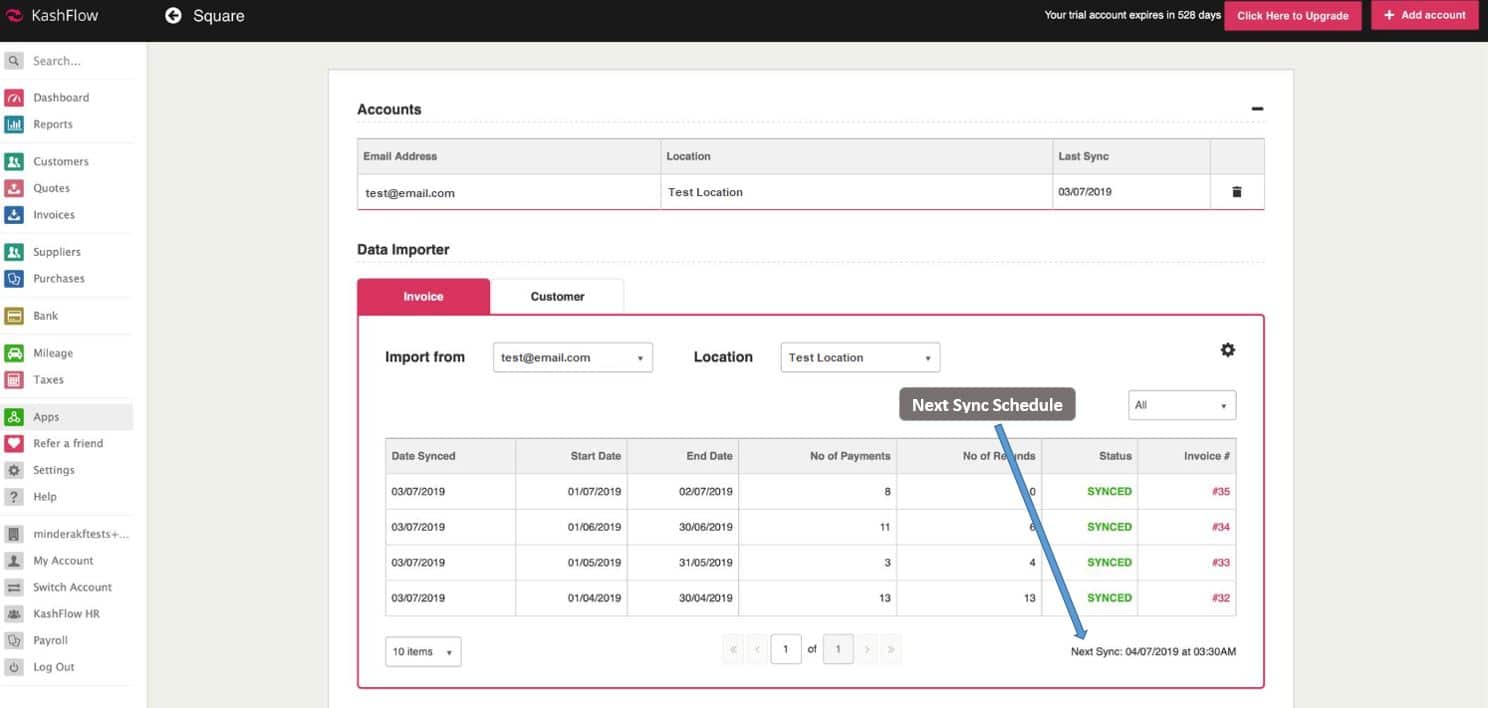
Once the invoice importer is all configured the invoices will import automatically on a daily basis. One invoice will be created for each calendar day in your location’s local time zone defined in Square, and one payment will be taken for each tender type you accept on that day. You will be able to see when the next synchronisation is due by going to Apps> Square and this is shown towards the bottom of the screen.
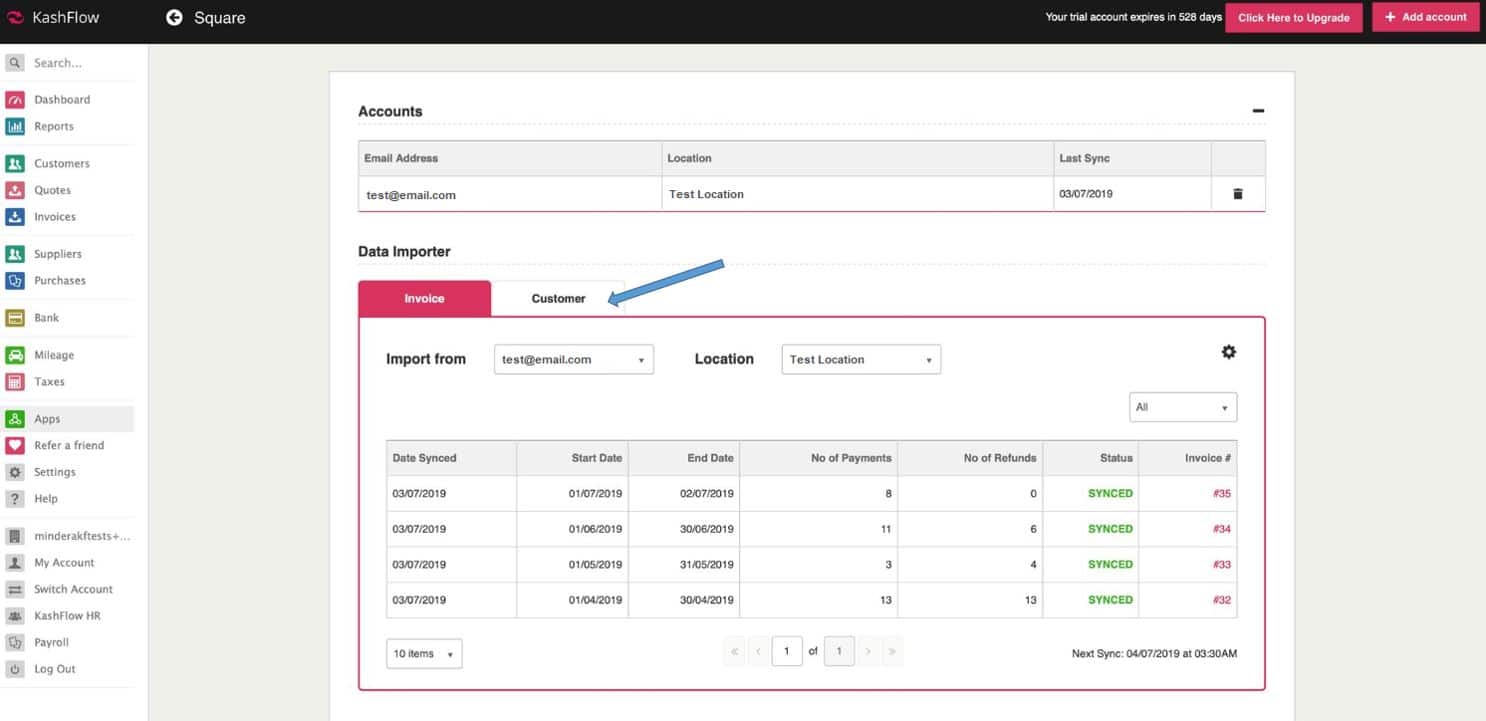
If you would like to import customers after your initial setup, you can do this by going to Apps> Square> Customer.
At present KashFlow is unable to cater for part payments made through Square, but we’re looking at this for future consideration.