In this article we will be guiding you through KashFlow’s new feature Mileage.
Set up
If you are a Partnership or Sole Trader – You will find the Mileage tab in the main taskbar on the left of your KashFlow account. When you first click on to the Mileage tab you will be presented with the following screen.
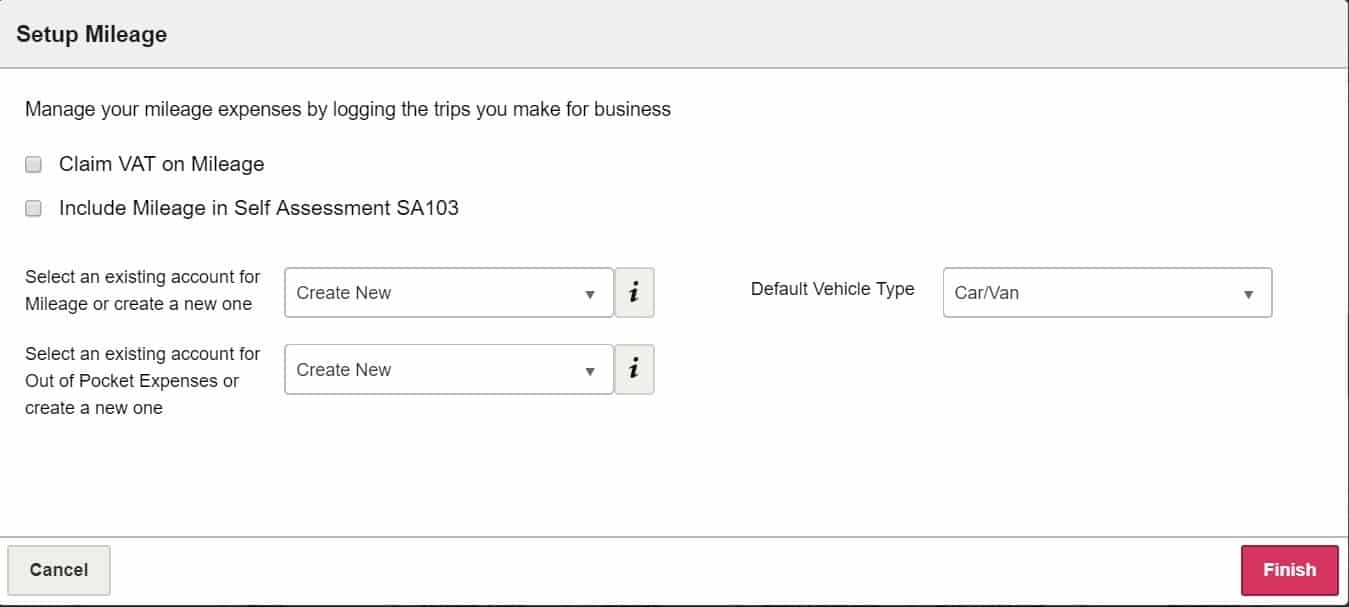
From here you will select whether you would like to Claim VAT on your Mileage and also whether you would like to Include Mileage in your Self Assessment tax returns.
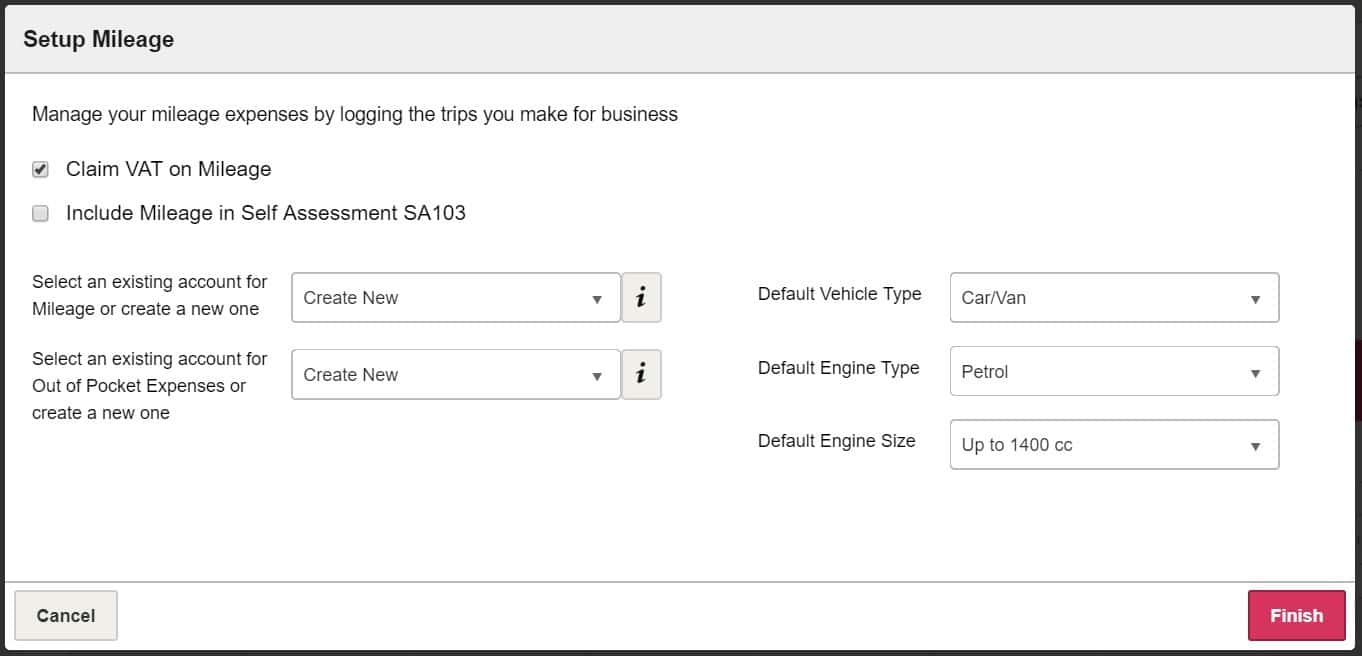
Should you tick the option to claim VAT on your Mileage you will see two additional dropdowns appear;
Default Engine Type and Default Engine Size.
You will need to select a code for both Mileage and Out of Pocket Expenses. If you do not have a code set up already – We will create one for you.
Once you have selected your options – Click Finish.
Now you will be brought through to the Overview of your Mileage.
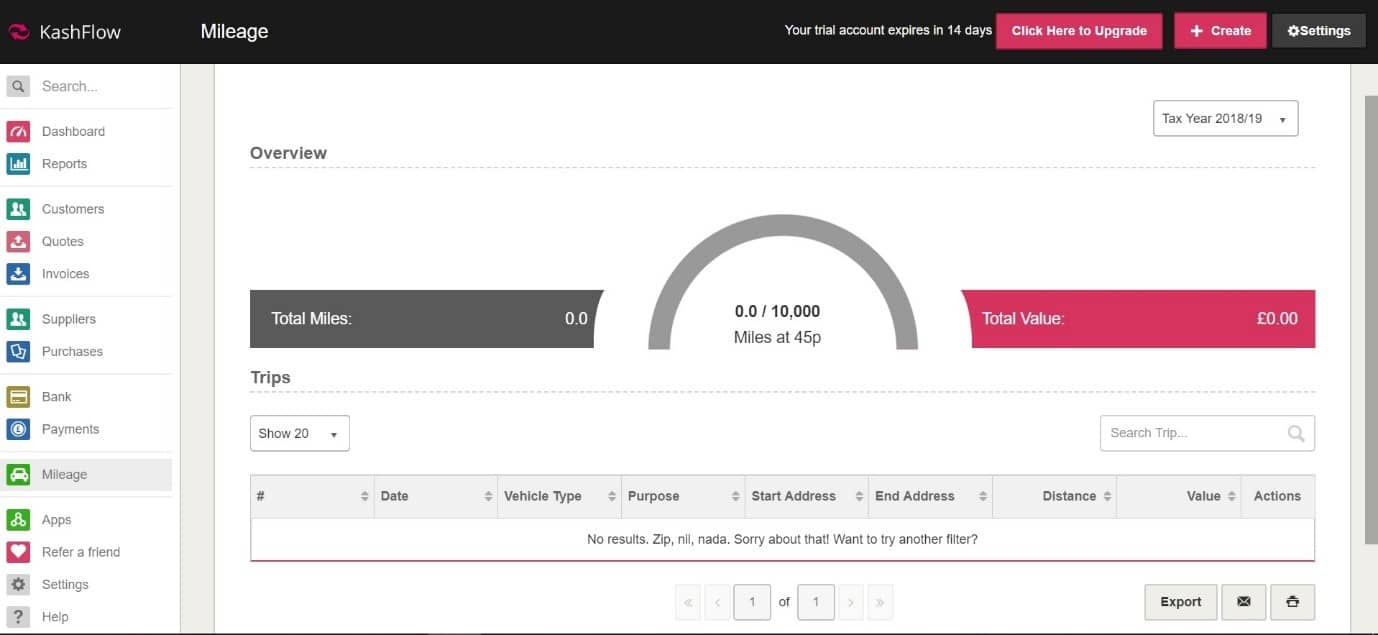
From the Overview page you will see your Mileage at 45p so far.
You will also see an overview of the mileage entered which you can export, email and print.
Creating a Mileage entry
Once you have entered your Mileage tab you can press Create+ top right of your screen. Once done you will be presented with the following screen:
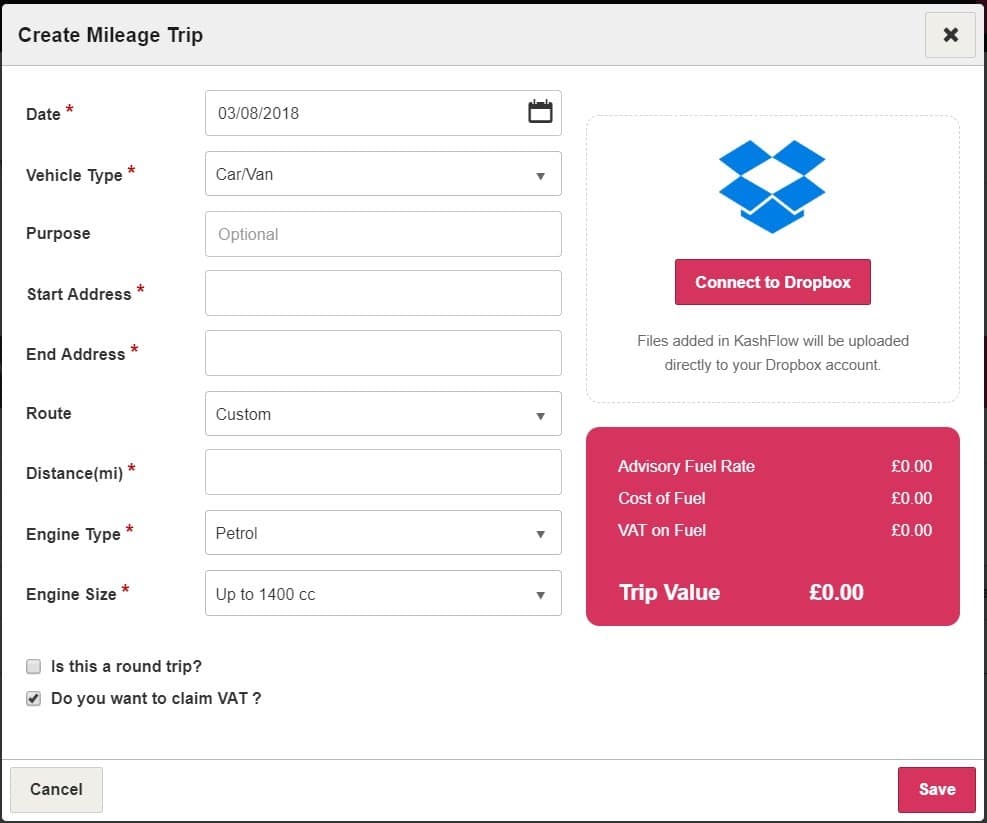
First, you will select the date that the Mileage was completed. Your Vehicle Type will be automatically prefilled from your choice of default on your Set-Up. This can, of course, be changed by selecting the dropdown.
From there you will enter your Start and End address. These fields are powered by Google Maps. You can search for the location by entering the postcode, street name or town.
Once that’s done you will notice your route will automatically select the fastest route. You can change this to match the actual route you took.
We will then prefill the miles done. This is again something you can change by overwriting the field.
Your engine type and size will be prefilled, but you can change this too.
You can select if this was a round trip and if you want to claim VAT on your Mileage by ticking the two boxes below.
Finally, you can attach a picture of a receipt should you have Dropbox connected to your KashFlow account.
Once you hit Save you will be brought back to the Mileage page where you can see your Mileage has slightly altered your statistics.
There is also an option to copy previous entries. Under the ‘Actions’ tab you will see the paper icon from here you can adjust the details.
