As a Kashflow Connect user you can use Bulk Actions to perform various tasks on multiple clients in a single step, without the need to open and close client details. Bulk actions are available to both Admin & Client Manager roles.
From the Client Dashboard you can use bulk actions to:
- Export Client Details
- Assign User to Clients
- Assign Clients to Group
- Set Reminder
Client Dashboard
On the Client Dashboard you will find the Bulk Actions button. With no client(s) selected, this button will be deactivated.
Use the check box to select which clients you wish to apply bulk actions to:
Now the Bulk Actions button is activated.
Export Client Details
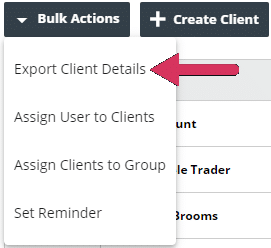
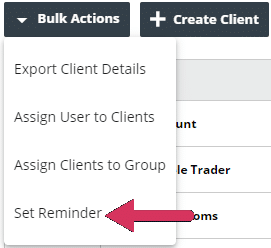
With your clients selected, go to Bulk Actions > Export Client Details
This will create a CSV export of the selected client details including:
- Name
- Username
- Account Status
- Package
- License Expiry Date
- Chart of Accounts
- Last Bank Rec Date
- Accounting Period End Date
- Business Type
- Address Line 1
- Address Line 2
- Town/County
- Country
- Postcode
- Telephone
- Email Address
- Website
- Last Login Date
Assign User to Clients
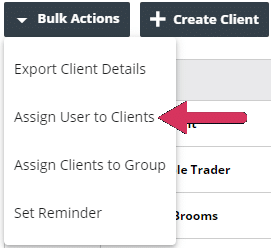
With your clients selected, go to Bulk Actions > Assign User to Clients
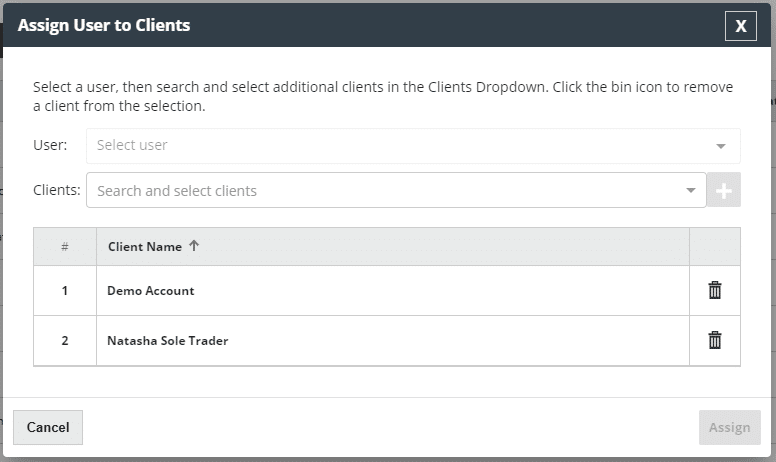
This will open the Assign User to Clients window:
Select the user from the User drop-down menu. If you wish, you can add more clients during this step. Start to type a clients name in the Clients field and you will see the matching options available for you to select. You can remove clients from the list using the trashcan button.
When you are happy with the selected clients, click Assign.
This user is now assigned to the clients selected.
Please Note: Users need to be created in Additional Users before they can be assigned to clients
Assign Clients to Group
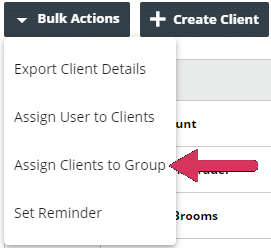
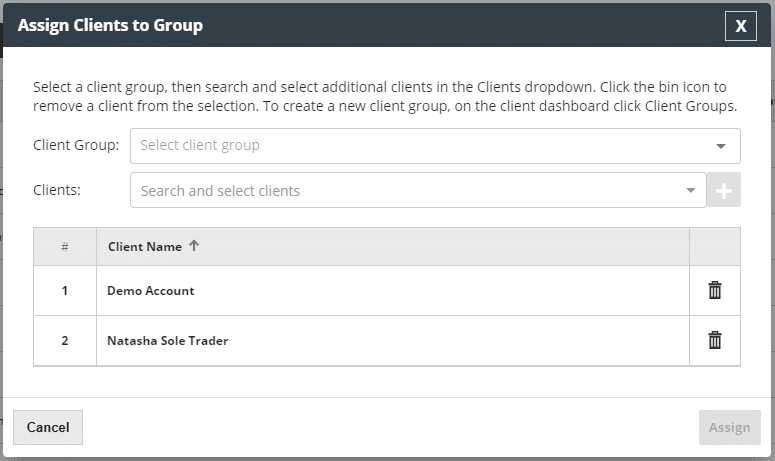
With your clients selected, go to Bulk Actions > Assign Clients to Group
This will open the Assign Clients to Group window:
Select the user from the Client Group drop-down menu. If you wish, you can add more clients during this step. Start to type a clients name in the Clients field and you will see the matching options available for you to select. You can remove clients from the list using the trashcan button.
When you are happy with the selected clients, click Assign.
The selected clients are now assigned to the chosen group.
Please Note: Groups need to be created in Client Groups before clients can be assigned to them.
Set Reminder
With your clients selected, go to Bulk Actions > Set Reminder
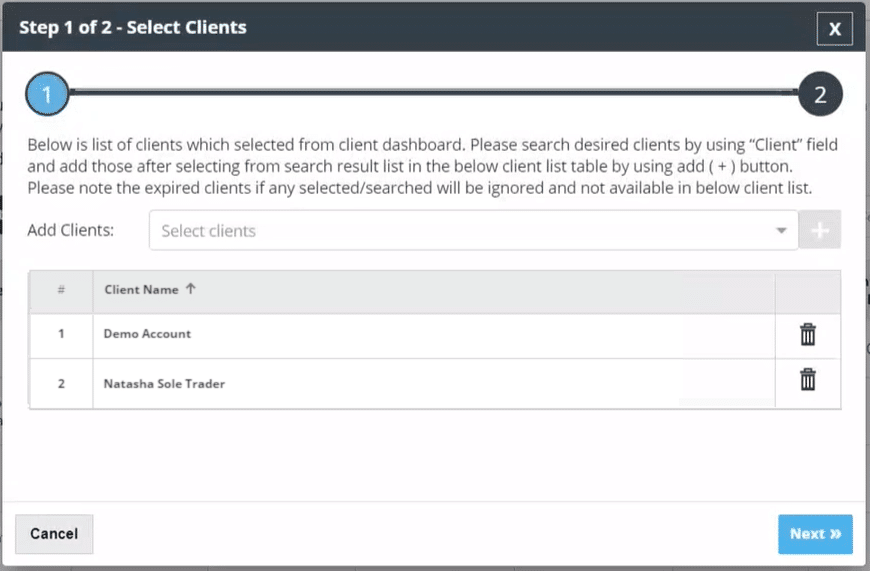
This will open the Step 1 of 2 – Select Clients window:
If you wish, you can add more clients during this step. Start to type a clients name in the Add Clients field and you will see the matching options available for you to select. You can remove clients from the list using the trashcan button.
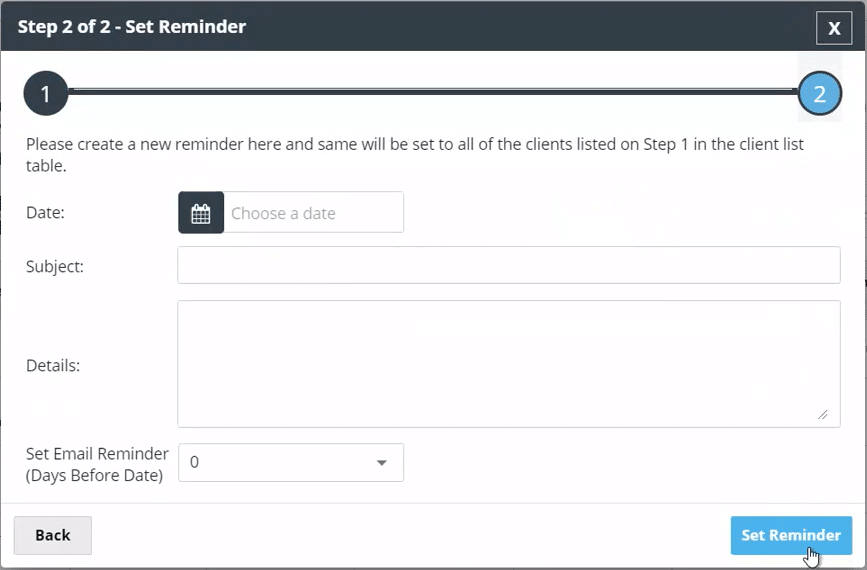
When you are happy with the selected clients click Next. This will open the Step 2 of 2 – Set Reminder window:
Complete the details of the reminder. When you have complete the details click Set Reminder. The selected clients now have a reminder set.


