This article will inform you how to connect KashFlow with KashFlow Payroll, what gets sent over and any potential errors you may find on the way.
How to integrate to KashFlow
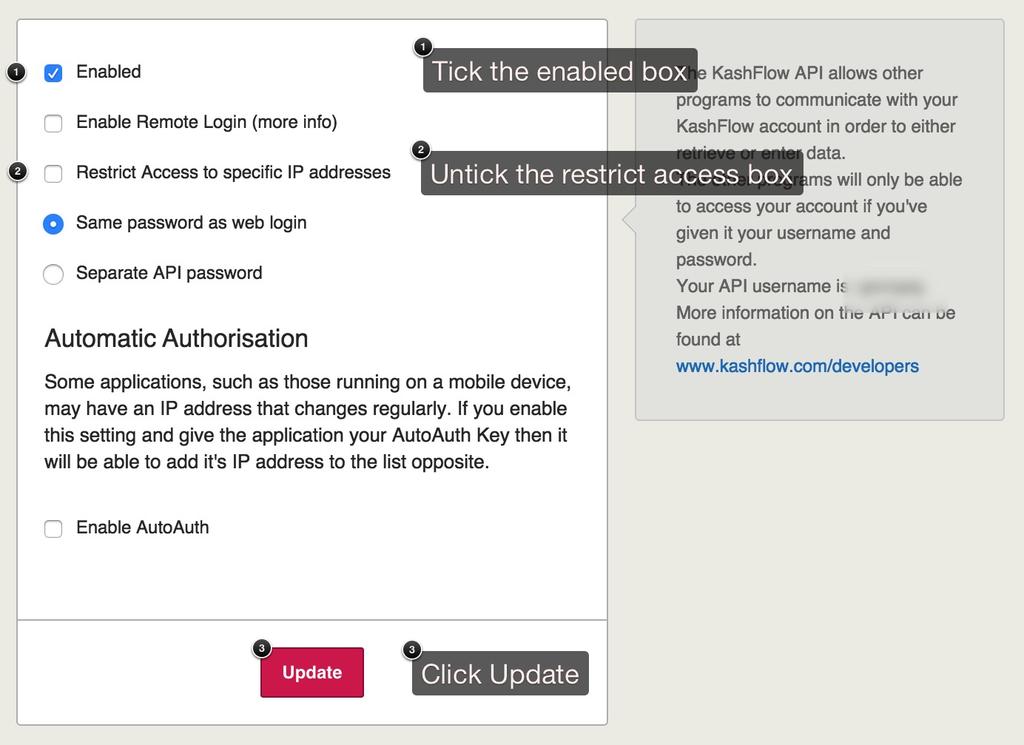
First you would need to go in to KashFlow and make sure you have the API (Application Programming Interface) enabled. You can find this in Apps> API Settings (top right) then just tick Enable. This will then open your account to another software to access it through a API link.

KashFlow Payroll
Once you log in to KashFlow Payroll, just go to Company> Integration> You’ll then to see where to enter your KashFlow Username and Password.
First you’ll need to tick I Would Like to Integrate With KashFlow then enter your KashFlow username and password.
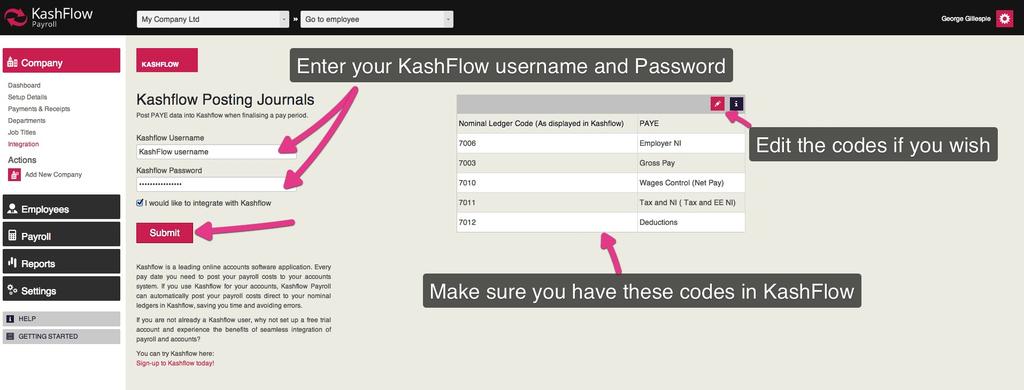
This will then integrate in to KashFlow straight away and you can start posting immediately.
What Happens Once You’re Integrated
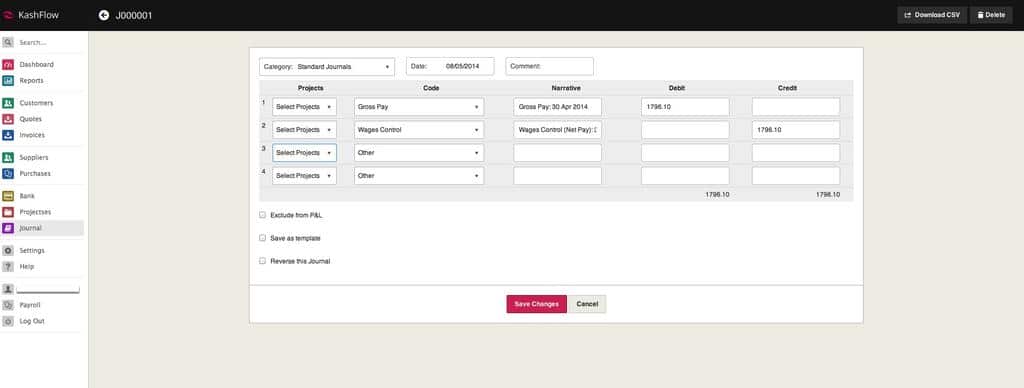
You can then run your Payroll in KashFlow Payroll then we will then post a journal in to your account showing your Payroll. You can find this under the Journals tab. You will notice the entries are made against the codes you selected when integrating KashFlow Payroll to KashFlow.
It’ll look something like this…
KashFlow or KashFlow Payroll will NOT make the payment to your employees for you. You must do this manually through your Bank.
You should now be all set up and able to posts Journals in to KashFlow from KashFlow Payroll.