KashFlow integration with MailChimp – Email Newsletters
 Our customers are used to having all of their invoicing and accounting tasks made really easy and they often ask us to recommend products that are equally as affordable, easy-to-use and well supported.
So when we recently started using MailChimp for our own email marketing we knew KashFlow customers would love it too. Until now when people have asked how to email all of their customers we’ve advised them to use the CSV/Excel download to import into one of the many products on the market.
That ends today with the release of seamless integration with MailChimp.
What does it do?
The integration between KashFlow and MailChimp gives you the ability to push all of your customer information (name, email address, number of invoices, total invoiced, etc) into MailChimps fantastic software.
Then, from MailChimp you can easily send emails to your customers. You can send newsletters to all of your customers, or offers to a specific set of customers (ie, all those who have spent more/less than a certain amount, those that have only bought once, etc)
Mailchimp give you a range of tools and reports to make the creation of these emails very easy and you can track who opened your emails and even who clicked on your links.
How much does it cost?
There’s no charge from KashFlow for using this additional service.
If you’ve got less than 2,000 customers and plan on sending less than 12,000 emails a month (that’s probably most of us) then there’s no charge from MailChimp either.
Getting up and running
All you need is a KashFlow account (get a free trial here) and a MailChimp account.
No technical knowledge is required to get the two systems talking to each other.
In KashFow, go to the Settings tab, scroll to the bottom of the page, click the MailChimp icon and follow the instructions on screen.
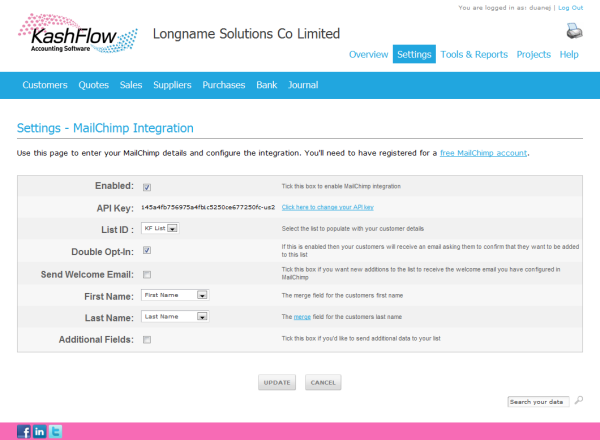
Once set up, you’ll be able to choose which “List” in MailChimp you want to send your customer list to and choose whther you want you customers to “double opt-in” to your list and whether or not to have them receive your automatic welcome email.
The drop-down lists are populated with the fields you have set up in MailChimp for the chosen list. So choose the correct field to store the first and last name of your contact and if required then tick the “Additional Fields” box to select which other fields you’d like to send to MailChimp.
That’s the configuration all done.
When you click “Update” you’re taken back to the main MailChimp Settings page and with a click of a button your customer data is sent into the MailChimp system.
All you have to do then is log in to your MailChimp account and get emailing. You’ll find the MailChimp site has lots of help and guidance on how to get the most our of your email list.
Give it a go and use the comments section below to let us know how you get on.
Enjoy!